
Introduction
Himalayan bird photography is one of the more demanding branches of wildlife photography, and also one of the most rewarding. Nepal is a particularly interesting place to practice it, since a single trip can move through lowland forests and wetlands, mid-hill woodland, and high Himalayan terrain, each with its own birds, light, and challenges.
Conditions can shift quickly in this kind of landscape. A clear morning in a forest can turn misty within an hour, and light at higher elevation behaves very differently from light in a dense lowland canopy. This article walks through the practical side of Himalayan bird photography in Nepal, from gear and camera settings to composition, elevation-specific challenges, and ethical field practice, with the goal of helping photographers work more effectively without putting birds under unnecessary stress.
Why Photograph Himalayan Birds?
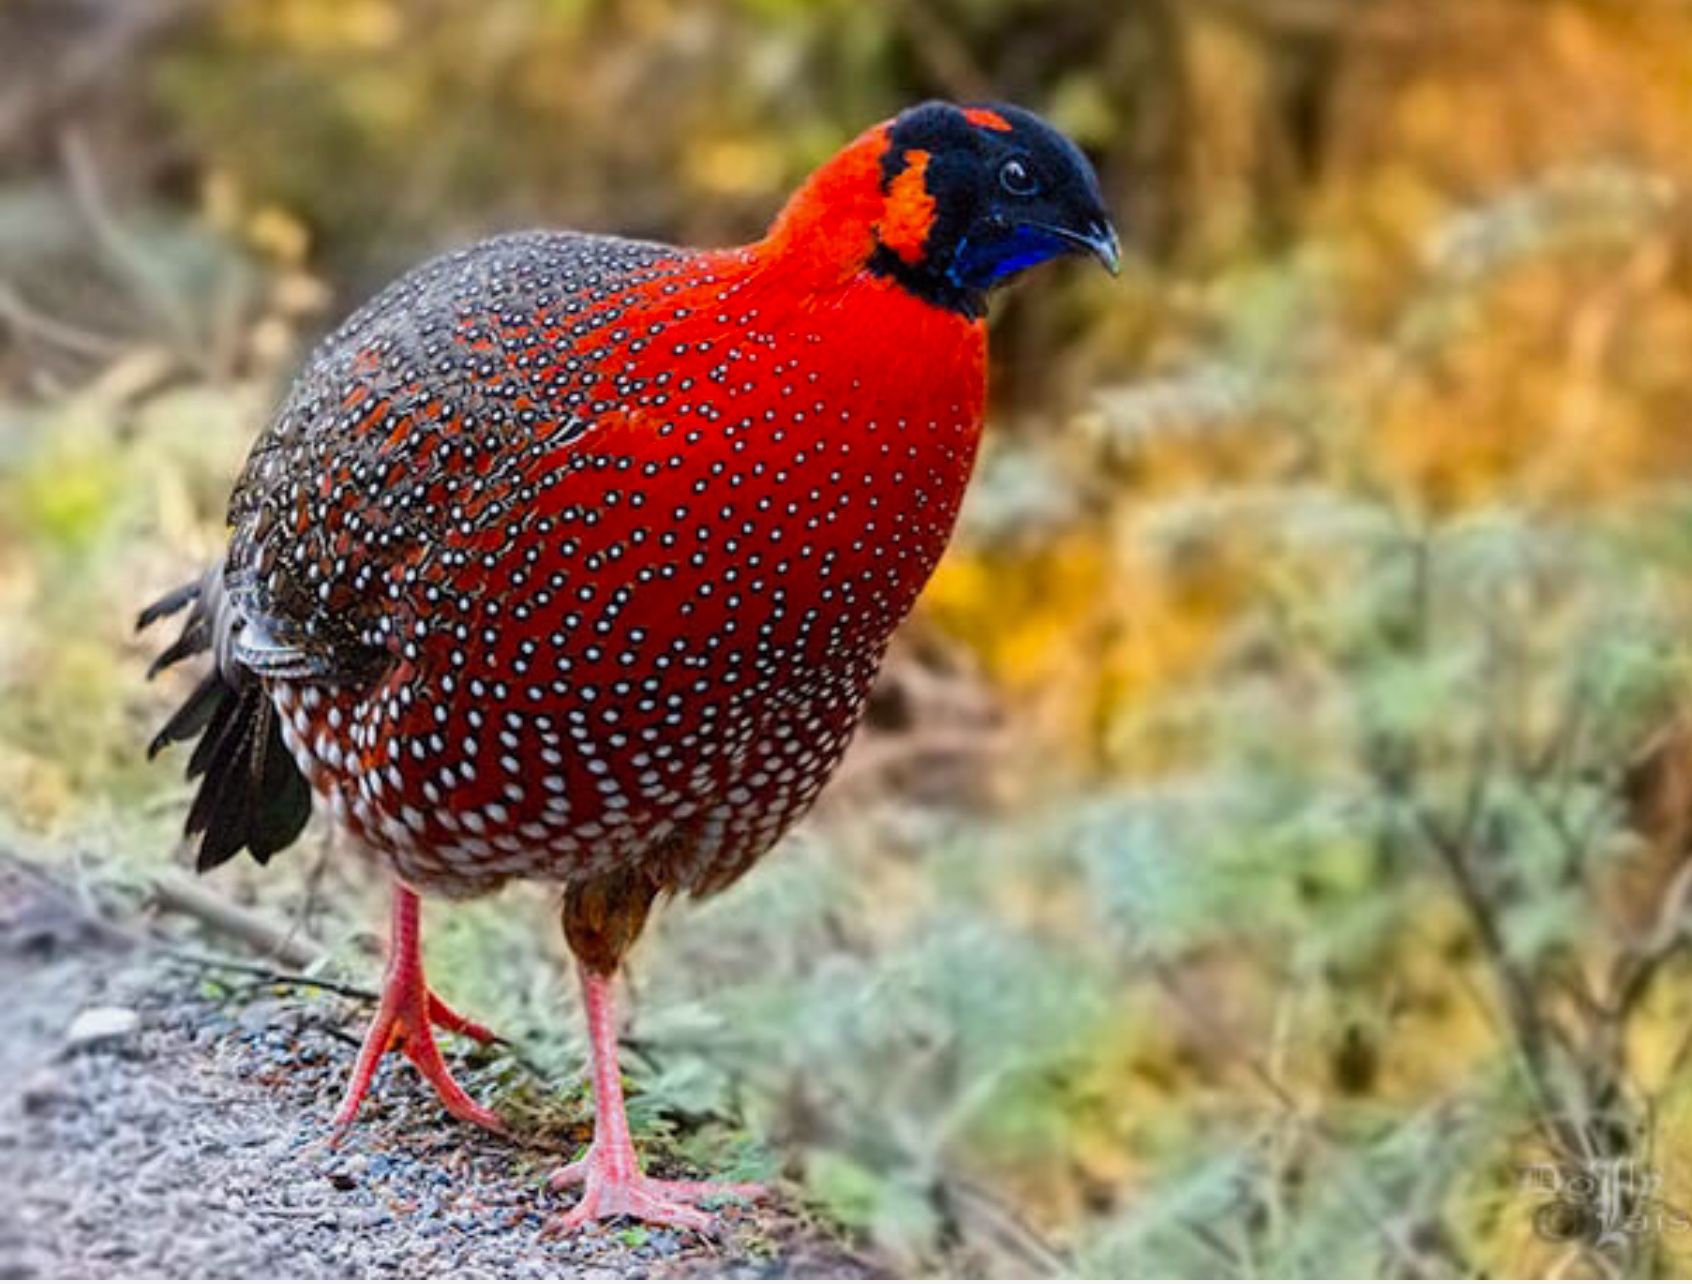
Birds across Nepal’s habitats offer a wide range of subjects for photographers, from brightly plumed forest species to larger raptors soaring over open ridgelines. Their varied body shapes, feeding habits, and perching or flight behavior give photographers many different kinds of images to work toward, not just close-up portraits.
Seasonal change adds another layer of interest. The same location can look and sound completely different depending on the time of year, as resident species shift their behavior and migratory birds arrive or depart. Forest and mountain backgrounds also give photographers a chance to place a bird within its environment rather than isolating it against a plain backdrop.
It helps to remember that strong bird photography depends more on patience, observation, and an understanding of behavior than on having the most expensive equipment available. Watching how a bird moves, feeds, or calls before raising the camera will usually produce better results than reacting the moment a bird appears.
Understanding Himalayan Bird Habitats
Forest Birds
Forest photography often means working with low light, dense branches, and leaves that can block a clean view or confuse autofocus. Patience and a clear line of sight matter more here than a fast approach.
Open Mountain Areas
Open terrain tends to offer cleaner, less cluttered backgrounds, which can make flight photography and full-body shots easier to compose than in dense forest.
Wetlands and Rivers
Wetlands and river edges are useful for photographing waterbirds and waders, which often stay in relatively open, predictable feeding areas.
High-Altitude Habitats
Higher elevations bring colder temperatures, sparser vegetation, and weather that can change quickly, all of which affect both bird behavior and camera performance.
Suitable environments for this kind of photography in Nepal include lowland and mid-hill forests, alpine areas, river valleys, wetlands, and various protected areas across the country. No single location guarantees a particular species, and photographers should treat every session as an opportunity rather than a certainty.
Essential Bird Photography Gear
A telephoto lens is the single most useful piece of equipment for bird photography, since it allows a photographer to keep a respectful distance while still filling the frame. Zoom telephoto lenses offer flexibility to adjust framing quickly, which is useful when a bird’s distance changes unpredictably. Prime telephoto lenses tend to offer a fixed but often wider maximum aperture, which can help in lower light, though they require the photographer to move rather than zoom to adjust framing.
A monopod can help steady a heavy lens during long sessions without the setup time of a full tripod, while a tripod is more useful for stationary subjects such as birds at a known perch or nest site viewed from a respectful distance. Extra batteries and memory cards matter more in the field than at home, since cold temperatures at higher elevation can drain batteries faster than expected. A rain cover protects equipment during sudden weather changes, and a lens cloth helps manage condensation and dust. Binoculars remain useful even when carrying a camera, since they let you locate and observe a bird before deciding whether and how to approach for a photograph.
Gear Checklist Table
| Equipment | Main Purpose | Why It Helps |
| Camera body | Image capture | Controls autofocus and exposure |
| Telephoto lens | Reach | Allows distant subjects to be photographed |
| Extra battery | Backup power | Useful during long field sessions |
| Rain cover | Weather protection | Protects equipment |
| Binoculars | Bird detection | Helps locate birds before photographing |
Recommended Camera Settings
There is no single perfect setting for every situation. The following are practical starting points to adjust based on light, subject movement, and your own equipment.
Shutter Speed
A moderate shutter speed is usually enough for a stationary, perched bird. Moving birds need a faster speed to avoid blur, and birds in flight generally require the fastest shutter speed you can manage while keeping ISO and image quality reasonable.
Aperture
A wider aperture lets in more light and creates background blur that helps separate the bird from its surroundings, which is useful in cluttered forest settings. A narrower aperture increases depth of field, which can help when you want more of the bird, or a small group of birds, in sharp focus.
ISO
Raising ISO helps maintain a fast enough shutter speed in low-light forest conditions, but higher ISO also introduces more visible noise. The practical approach is to raise ISO only as much as needed for a usable shutter speed, rather than defaulting to the lowest possible setting regardless of light.
Autofocus
Continuous autofocus is generally more useful than single-shot autofocus for birds, since it keeps tracking a moving subject. Many current cameras also offer subject tracking or bird-eye detection, which can help maintain focus on the eye even as a bird moves through the frame. A single-point or small-zone focus area gives more precise control in cluttered scenes, while a wider zone can help track fast, erratic movement.
Shooting Mode
Shutter priority is useful when freezing motion is the main concern, since it lets you fix the shutter speed and let the camera manage aperture. Aperture priority suits situations where background blur or depth of field matters more than speed. Manual exposure with Auto ISO gives the most direct control over both shutter speed and aperture while letting the camera handle brightness through ISO.
How to Focus on Small and Fast Birds
Small birds moving through dense vegetation are among the hardest subjects to photograph well. Pre-focusing on a likely perch or gap in the foliage before the bird arrives can save valuable time once it appears. Continuous autofocus, paired with an appropriately sized focus area, helps the camera keep tracking as the bird shifts position.
Keeping the subject roughly centered as you first acquire focus makes it easier for the camera to lock on, after which you can recompose if your camera supports focus tracking through the frame. Some photographers prefer back-button focus, which separates focusing from the shutter release and can make it easier to track a moving bird without accidentally refocusing on the background.
It helps to practice on slower, more stationary birds before attempting fast-moving or erratic species. Branches and leaves in front of or behind a bird can confuse autofocus, pulling focus onto foliage instead of the subject, so watching the bird’s likely path and anticipating a clearer gap is often more effective than chasing focus after the bird has already moved.
Photographing Birds in Flight
Flight photography rewards preparation. Choosing a position with a relatively clear background, such as open sky or a distant ridge, makes it easier to keep the bird visually separated from its surroundings. A fast shutter speed is essential to freeze wingbeats, and continuous autofocus with tracking is far more effective than single-shot focus for a moving target.
High-speed continuous shooting increases the odds of capturing a well-timed wing position, since bird flight changes shape from one instant to the next. Try to track the bird smoothly rather than jerking the camera into position, and leave some space in the frame in the direction the bird is flying rather than centering it tightly.
Takeoff and landing moments often produce distinctive wing positions and are worth watching for specifically. Gliding birds, such as raptors riding air currents above a ridge, tend to be easier to track than birds in active flapping flight. Birds crossing open mountain terrain or flying low over wetlands can both offer strong compositions, though which species appear on any given day cannot be predicted or guaranteed.
Using Light and Weather to Your Advantage
Early Morning
Early morning light is generally soft and directional, and many birds are also most active during this period, which makes it one of the most productive times to photograph.
Golden Hour
The warm, low-angle light shortly after sunrise or before sunset can add strong color and long shadows, useful for more atmospheric images.
Overcast Conditions
Cloud cover diffuses light and reduces harsh shadows, which can be especially helpful for birds with contrasting light and dark plumage that are otherwise difficult to expose correctly.
Midday
Midday sun tends to create stronger contrast and can produce difficult highlights, particularly on pale or reflective plumage.
Fog and Mist
Mist can add atmosphere and a sense of depth to an image, though it also reduces contrast and can make both focusing and exposure more challenging.
Snow and Bright Mountain Light
Bright snow can fool a camera’s metering system into underexposing the scene, which is particularly noticeable when photographing darker birds against a snowy background. Some manual exposure adjustment is often needed in these conditions.
Protecting equipment matters as much as managing light. Guard against rain and snow with a proper cover, watch for condensation when moving between cold outdoor air and a warm indoor space, and be mindful of humidity and sudden temperature shifts, which can affect both camera performance and lens clarity.
Composition Tips for Himalayan Birds
Strong bird photography does not always mean a tight close-up. The rule of thirds remains a useful starting point for placing a bird within the frame rather than centering it by default. Negative space, meaning open sky, water, or foliage around the subject, can give an image room to breathe and emphasize scale or isolation.
A clean, uncluttered background helps the bird stand out, while natural elements such as branches or grass can be used deliberately as a frame rather than an accidental distraction. Shooting from eye level with the bird, rather than looking down on it, usually produces a more natural, engaging perspective.
Environmental portraits that include habitat, whether that is a forest understory, a wetland edge, or a mountain backdrop, can tell a more complete story than an isolated close-up. Capturing behavior, such as feeding, preening, or interacting with another bird, often results in a more memorable image than a static portrait alone.
Photographing Birds at Different Elevations
Low Elevation
Lowland habitats tend to be warmer and more humid, with denser vegetation that limits sightlines but offers rich, varied backgrounds and generally softer light under forest canopy.
Mid-Hills
Mid-hill forest introduces more mixed terrain and changeable light as you move between open clearings and denser woodland, often within a single outing.
High Elevation
Higher elevations bring colder temperatures, stronger and more direct sunlight, wind, and weather that can shift rapidly. Photographers should expect batteries to drain faster in the cold, and should protect equipment from wind-driven dust or moisture. Layered clothing and care in handling gear with cold hands both make a practical difference here.
Ethical Bird Photography in Nepal
Getting the photograph should never come before the bird’s welfare. Keep a respectful distance at all times, and never chase a bird to force a better angle. Nests should never be approached, and eggs or chicks should never be touched or handled. Avoid photographing in ways that block a bird’s feeding or breeding behavior, and use playback calls sparingly if at all, since overuse can cause real stress to wild birds.
Do not use food to attract wild birds for a photograph, and avoid flash where it might startle or disturb wildlife, particularly at close range or after dark. Always follow the rules of the protected area you are visiting, stay on permitted routes, and avoid damaging vegetation while getting into position. Be considerate of other birdwatchers and photographers sharing the same space, and keep noise low.
If you photograph a nest or a sensitive location, think carefully before sharing its exact whereabouts publicly, since revealing such locations can lead to disturbance from other visitors. Supporting responsible, conservation-minded birding practices helps ensure that Himalayan bird photography remains possible for years to come.
Common Bird Photography Mistakes
- Using a shutter speed that is too slow for the subject’s movement
- Relying completely on autofocus without understanding how to guide it
- Ignoring the background until after the shot is taken
- Overexposing bright or pale plumage
- Underexposing dark-plumaged birds
- Getting too close and disturbing the subject
- Chasing birds for a better angle
- Using excessive digital zoom instead of physically repositioning
- Forgetting spare batteries, especially in cold conditions
- Ignoring weather protection for equipment
- Taking many photographs without first observing behavior
- Focusing only on tight close-ups and missing environmental context
Practical Field Checklist
Before Leaving
- Charge batteries
- Format or check memory cards
- Clean the lens
- Check the weather forecast
- Check local access rules for the area
- Prepare appropriate clothing
- Pack binoculars
During Birding
- Observe before photographing
- Keep a respectful distance
- Watch the background
- Adjust shutter speed for the situation
- Monitor exposure as light changes
- Watch bird behavior for cues
- Avoid causing disturbance
After the Session
- Back up photographs
- Organize files by date or location
- Add species and location information where appropriate
- Select photographs for editing
- Preserve original RAW files where available
Frequently Asked Questions
1) What camera is best for Himalayan bird photography?
There is no single best camera. Useful features include reliable continuous autofocus, a reasonably fast burst rate, and good performance at higher ISO settings for low-light forest conditions.
2) What lens is best for bird photography in Nepal?
Telephoto reach is the main priority, since it lets you photograph birds from a respectful distance. Zoom telephoto lenses offer flexibility, while prime telephoto lenses often provide a wider maximum aperture for low light, at the cost of needing to physically reposition to change framing.
3) What shutter speed should I use for bird photography?
A moderate speed generally works for perched, stationary birds, while flight photography usually requires a fast shutter speed to freeze wing movement. Exact values depend on light and the specific bird’s speed.
4) Is a tripod necessary for bird photography?
Not always. Handheld shooting suits fast-moving situations, a monopod offers support during long sessions without much loss of mobility, and a tripod works well for stationary subjects viewed from a fixed, respectful distance.
5) What is the best time to photograph Himalayan birds?
Early morning generally offers soft light and higher bird activity, though conditions and behavior vary by season, habitat, and location.
6) Can beginners photograph Himalayan birds?
Yes. Beginners can start at accessible, well-known birding sites and focus on common, more easily observed species before attempting faster or more elusive subjects.
7) How can I photograph birds in dark forests?
A wider aperture, a higher ISO when needed, and continuous autofocus all help in low light. Patience and anticipating clear sightlines through foliage also make a significant difference.
8) Is flash photography safe for birds?
Unnecessary flash should generally be avoided, particularly at close range, since it can startle or disturb birds. When flash is used at all, it should be applied sparingly and only when it will not disrupt natural behavior.
Conclusion
Himalayan bird photography rewards patience as much as technical skill. Understanding a bird’s habitat and behavior, choosing sensible starting camera settings, and working with available light rather than against it all contribute more to a strong image than expensive equipment alone. Clean composition, whether a tight portrait or a wider environmental shot, helps tell a more complete story of the bird and its surroundings.
None of this should come at the bird’s expense. Keeping a respectful distance, avoiding unnecessary disturbance, and following the rules of protected areas are not separate from good photography, they are part of it. Successful Himalayan bird photography in Nepal is ultimately about documenting these birds thoughtfully, without disrupting the habitats and behavior that make them worth photographing in the first place.


'/></svg>)